Communication Channels
What is it?
Communication Channels allow you to manage multiple communication methods in your CRM. They help you connect with customers through different platforms and organize all conversations in a centralized location.
Why use Communication Channels?
- Multi-Channel Support - Connect email, chat, and other communication platforms
- Unified Inbox - See all customer conversations in one place
- Better Collaboration - Team members can access and respond to customer messages
- Customer Context - All conversation history is available with each customer record
Types of Communication Channels
Email Configuration
Email Configuration lets you connect email accounts (Gmail, Outlook) to your CRM so you can manage customer communications directly within your system.
Features:
- Gmail Integration - Connect your Google Gmail account
- Outlook Integration - Connect your Microsoft Outlook account
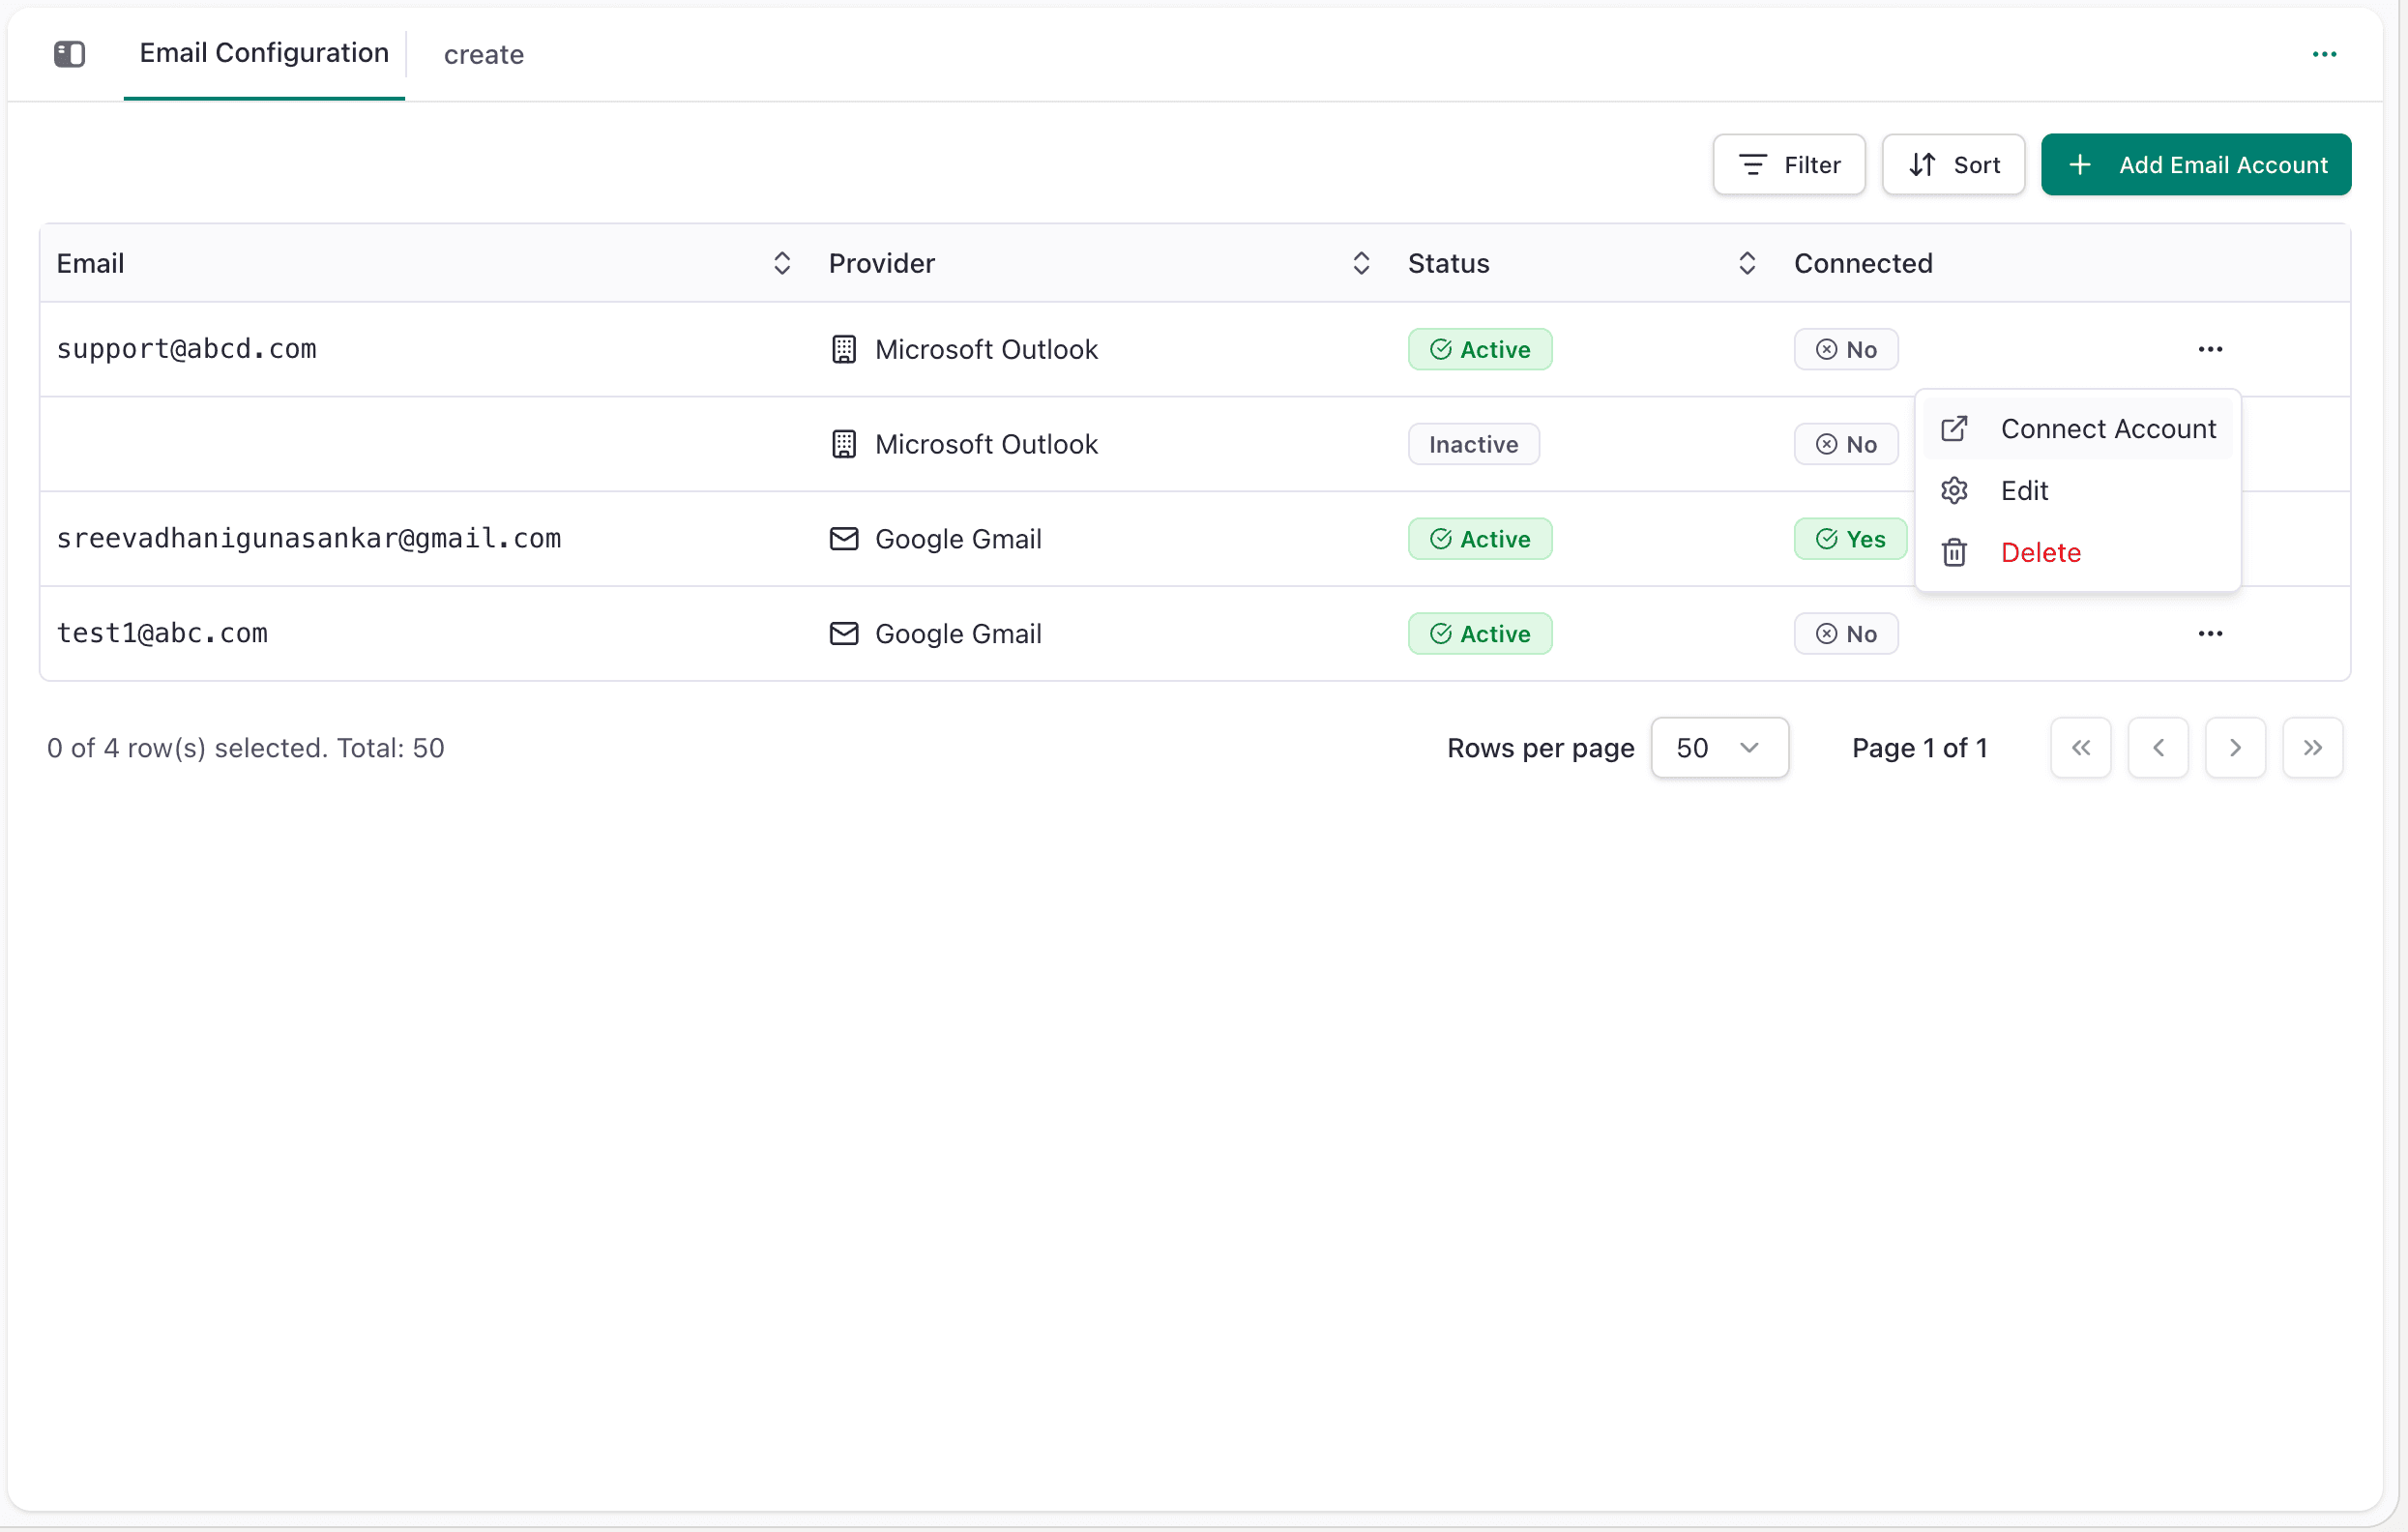
- Status Tracking - See which email accounts are active and connected
- Multiple Accounts - Connect as many email accounts as you need
Inbox Chat
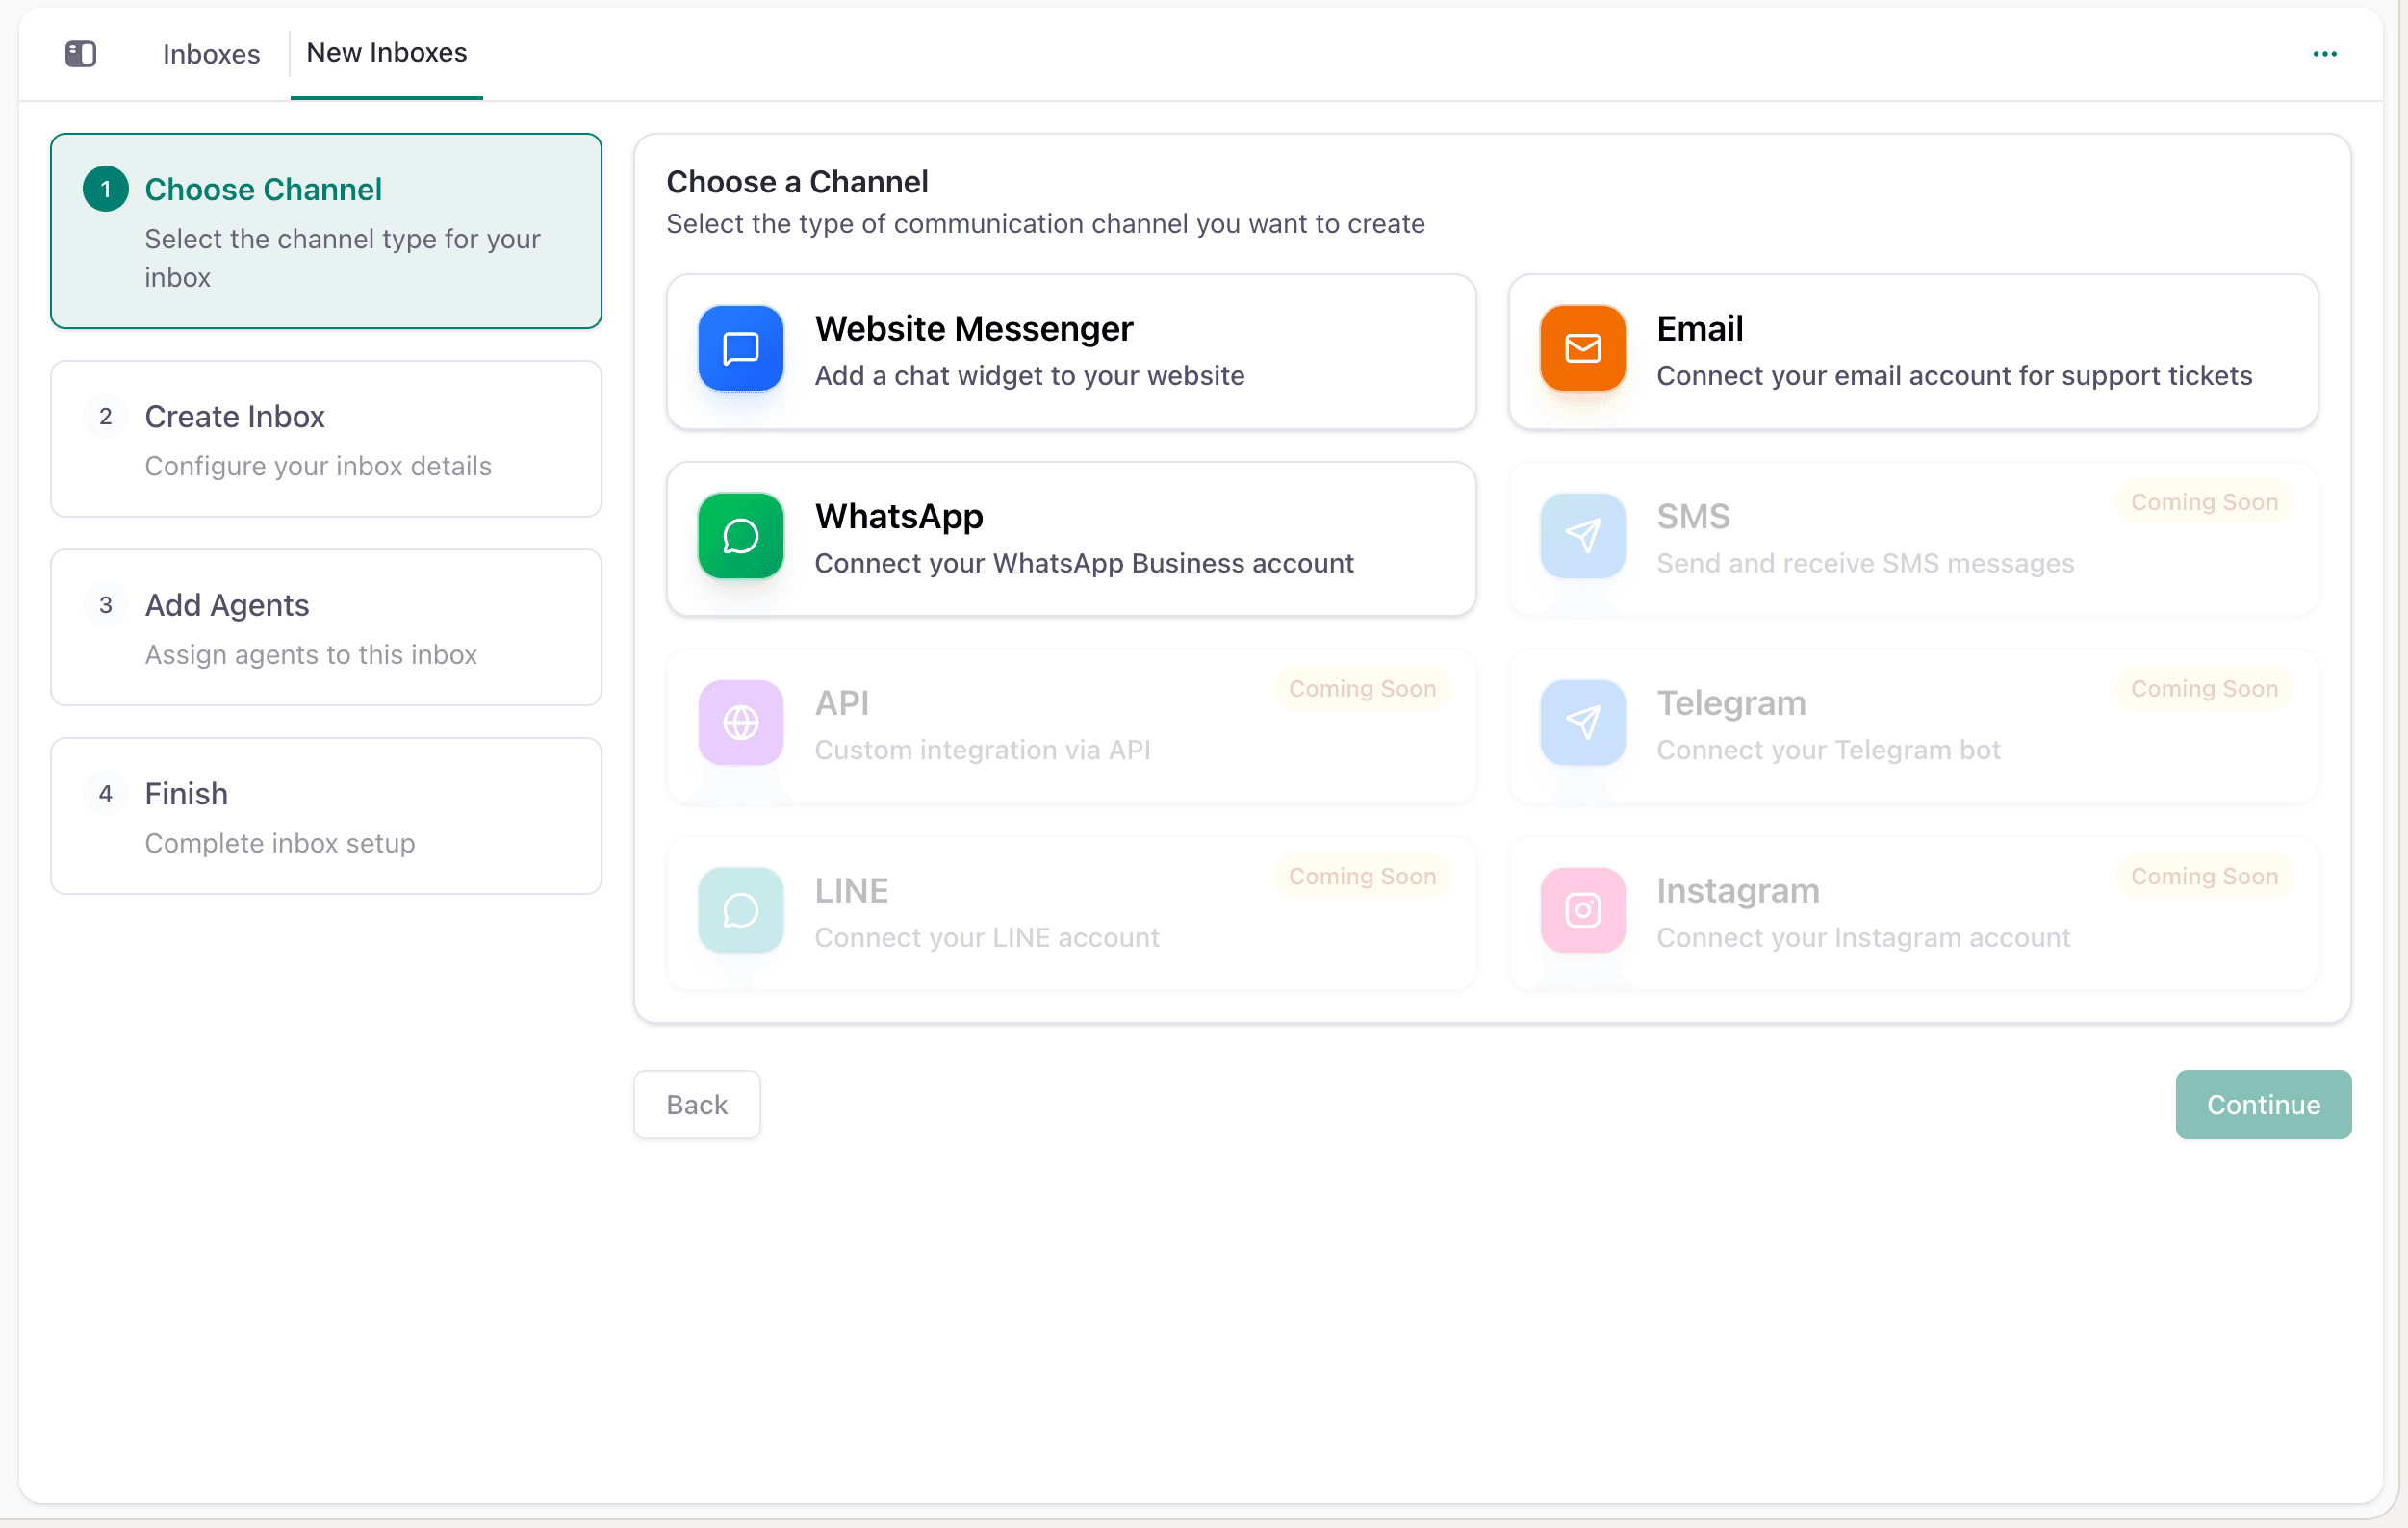
Inbox Chat enables you to manage customer conversations directly from the CRM. Create separate inboxes for different teams or departments.
Features:
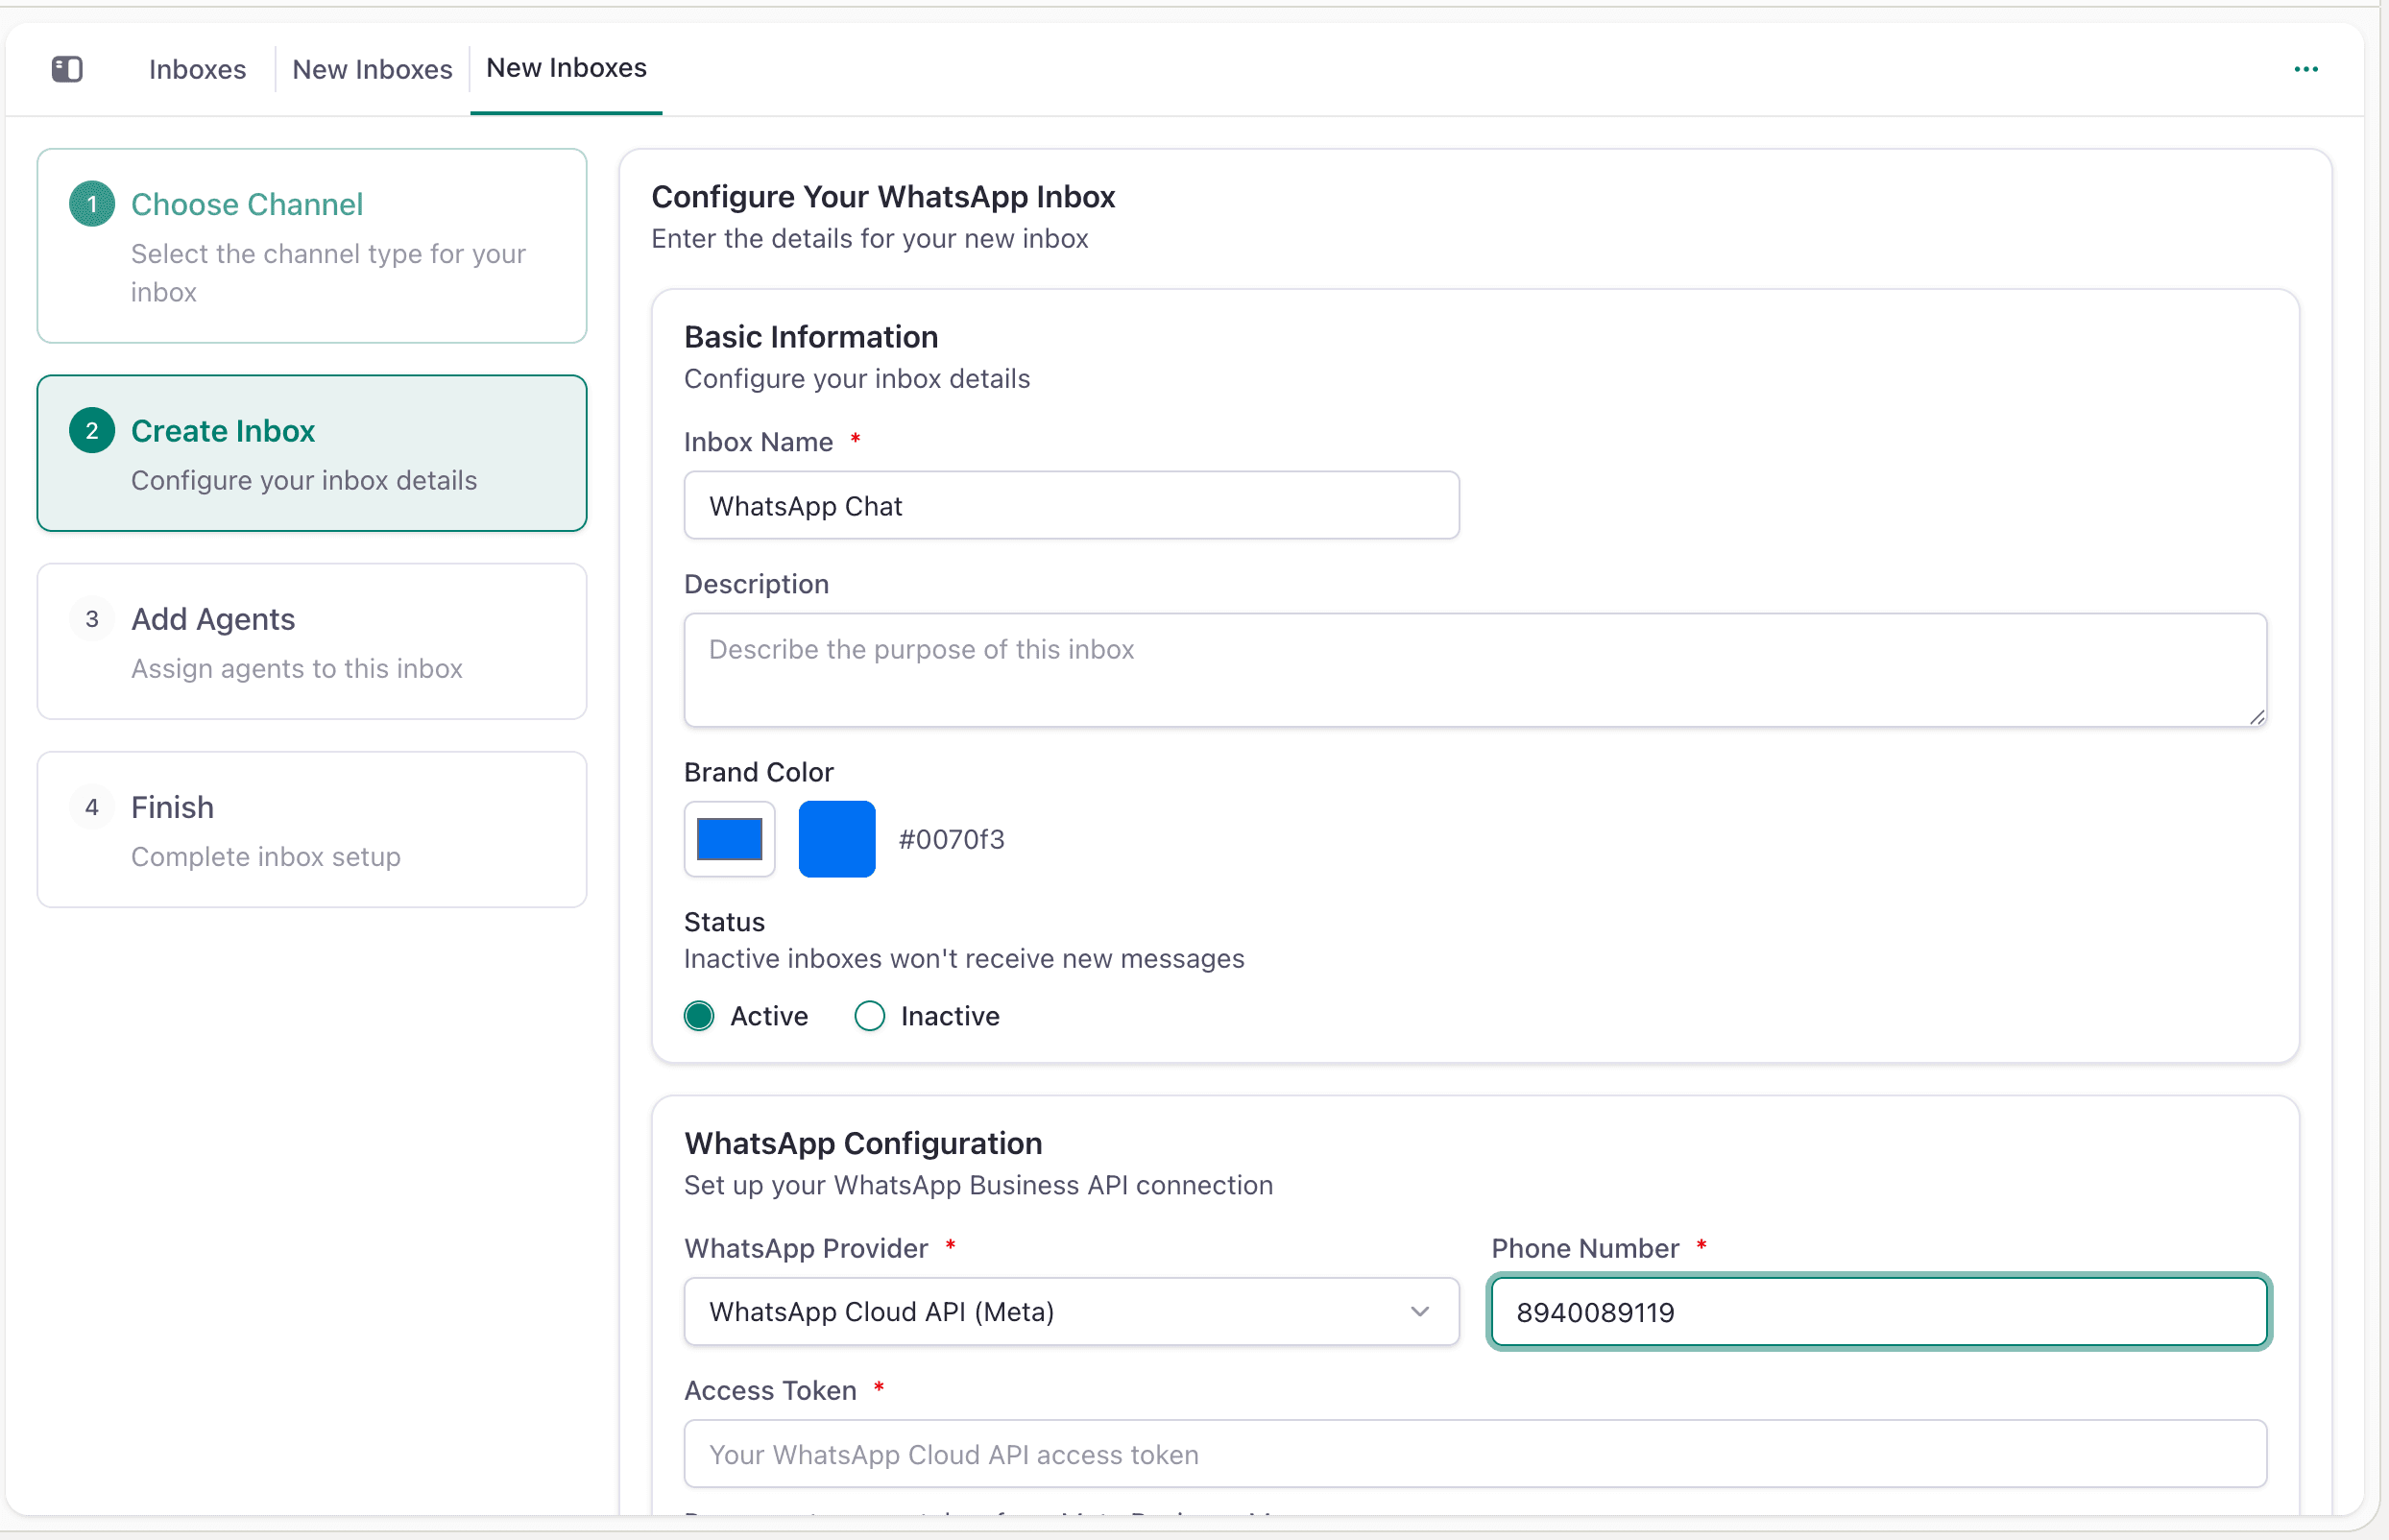
- Create Inboxes - Set up different inboxes for different teams or departments
- Agent Assignment - Assign conversations to specific team members
- Status Management - Track the status of each conversation (open, closed, etc.)
How to Get Started
Step 1: Configure Email Accounts
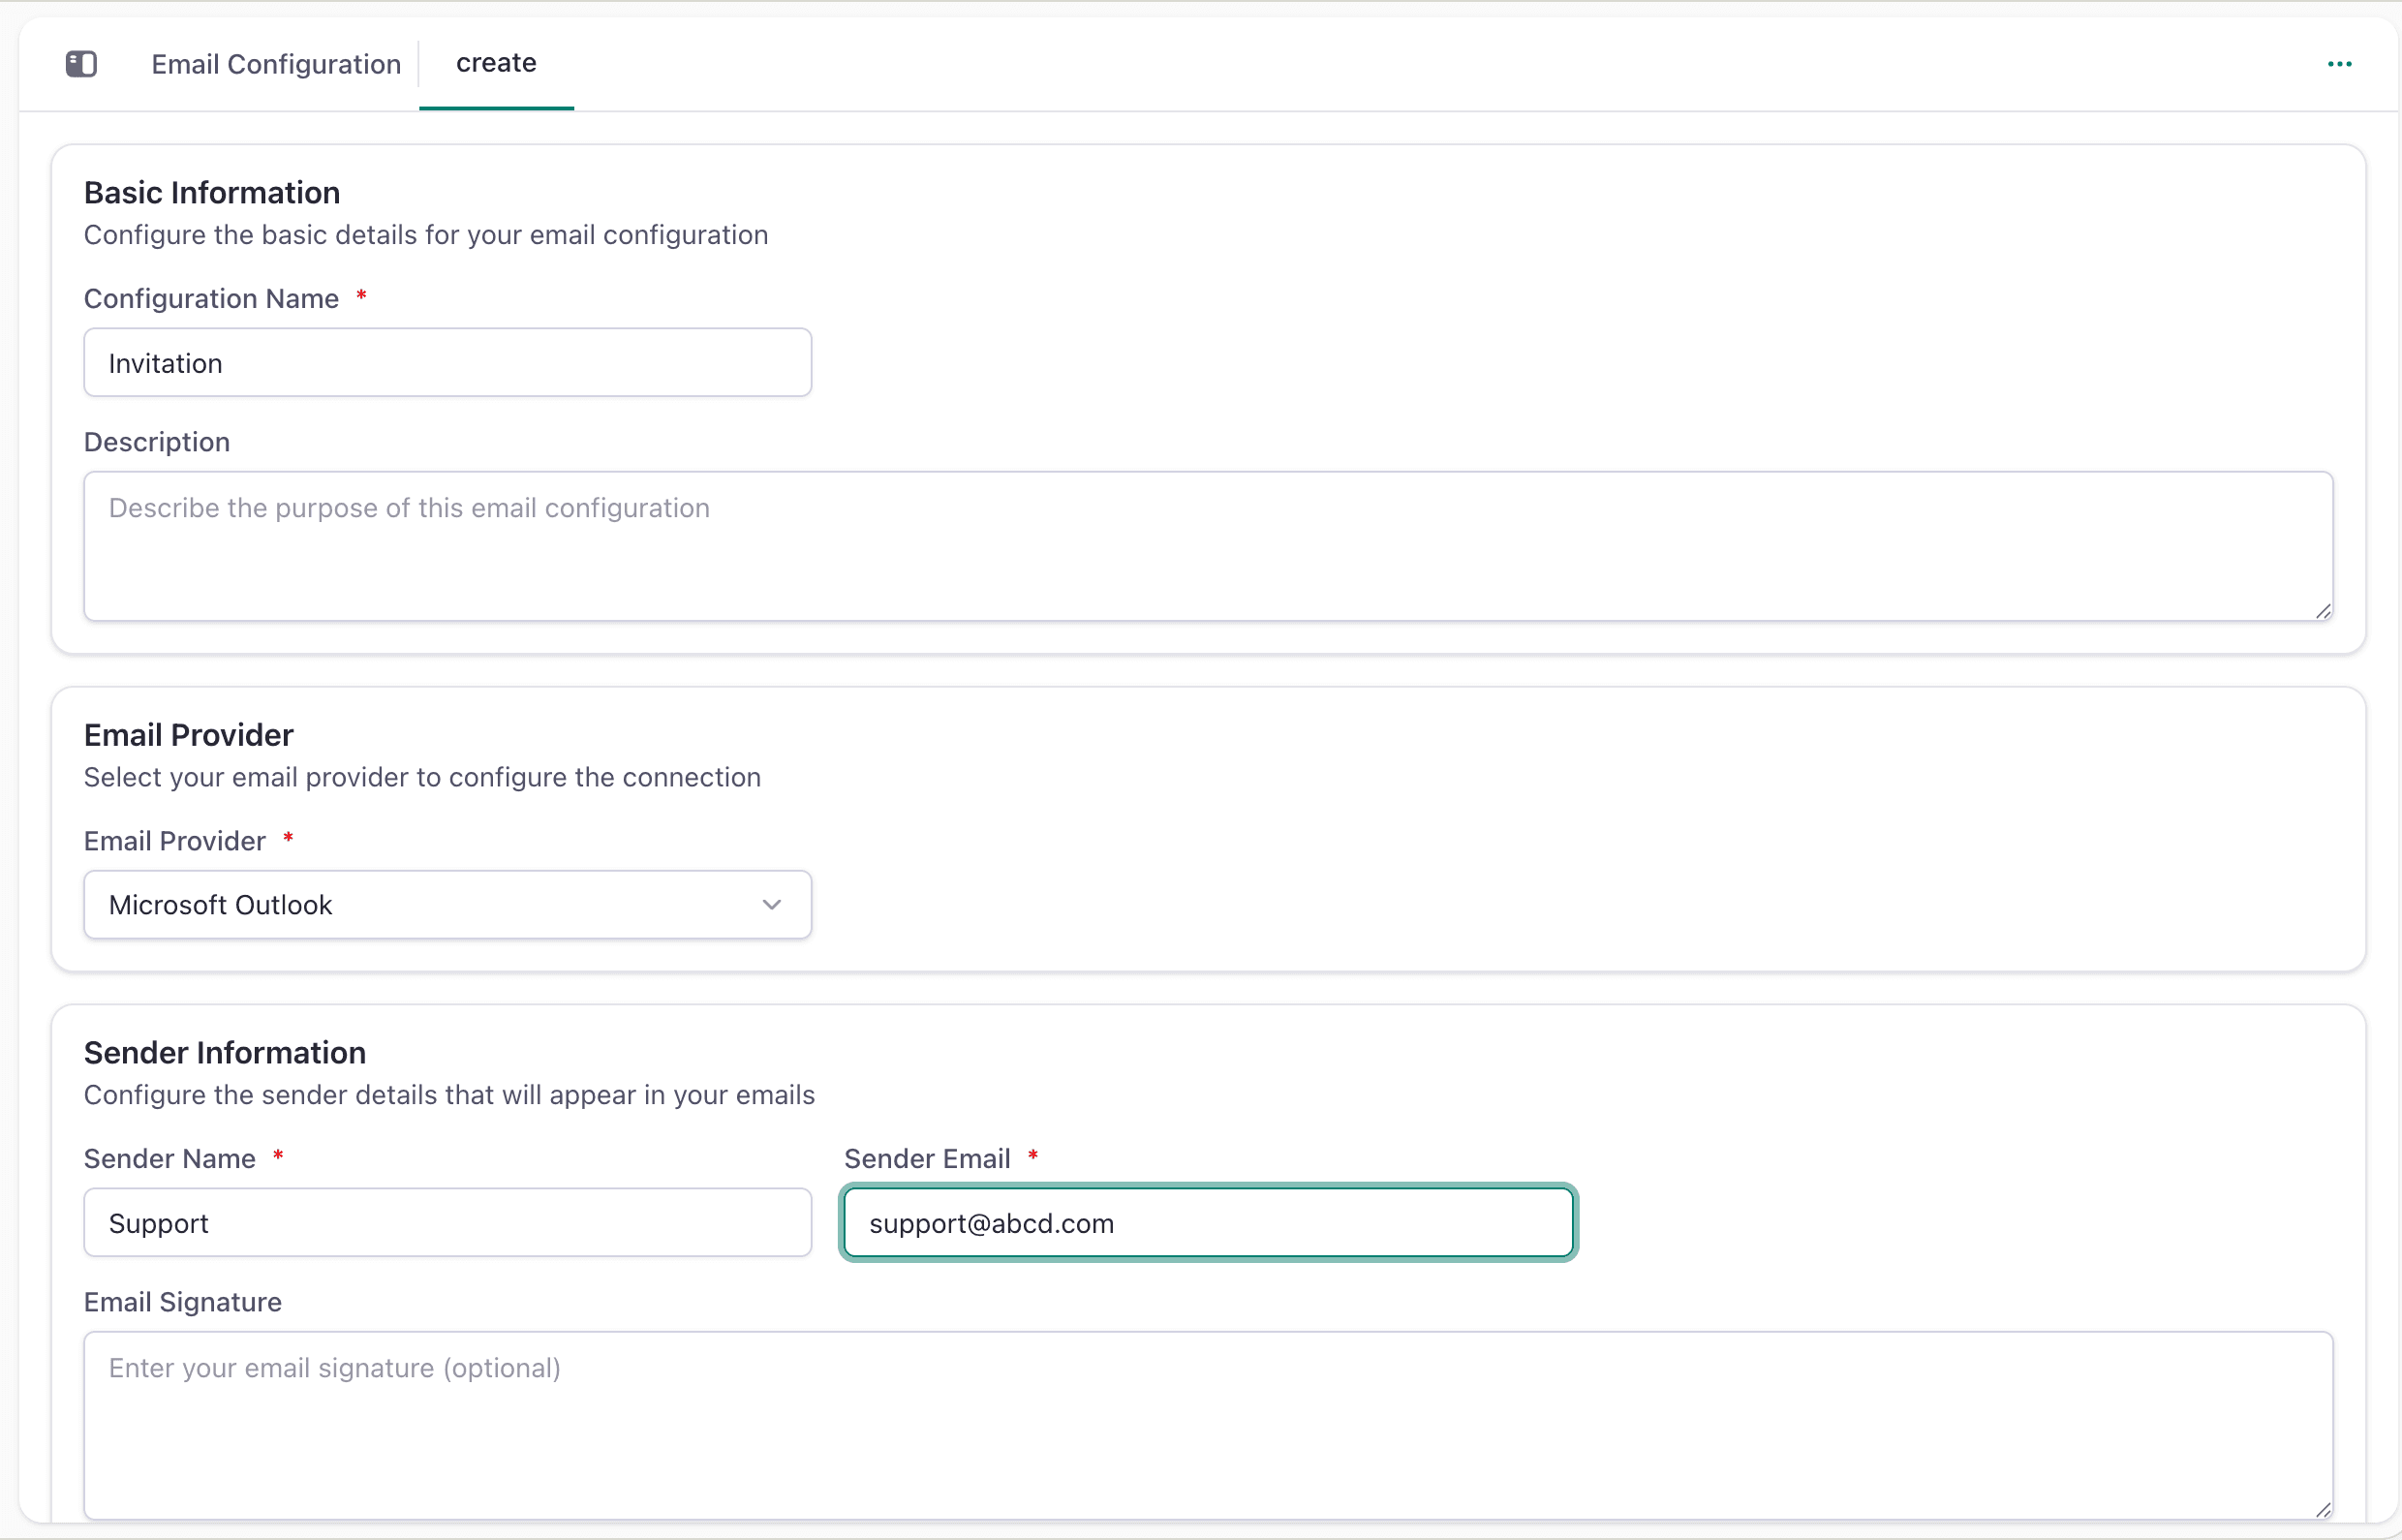
Navigate to Admin Center and select Email Configuration.
- Click Add Email Account
- Select your email provider (Gmail or Outlook)
- Authenticate your account with the provider
- Your email account is now connected and active
Once configured, your emails will automatically sync with customer records.
Step 2: Create Inboxes
Navigate to Admin Center and select Inbox Chat.
- Click New Inbox
- Enter the inbox name (e.g., Support, Sales, General)
- Select the inbox type based on your team structure
- Assign agents who can access this inbox
- Save your inbox configuration
- Connect the account by verifying it with Flinkk One
Step 3: Using Communication Channels
After configuration, you can use channels from any customer record.
- Open a customer record (Lead, Contact, etc.)
- View their complete communication history across all channels
- Reply directly from the customer record
- Messages are automatically logged and visible to your team
Best Practices
Do This:
- Connect all email accounts you use for customer communication
- Create separate inboxes for different departments or functions
- Assign appropriate agents to each inbox
- Regularly verify that email accounts remain connected
- Keep conversation history for compliance and reference
Don't Do This:
- Leave email accounts unconnected when actively used
- Overload a single inbox with too many agents
- Forget to update agent assignments when team changes
- Share sensitive information in unmonitored channels
Common Questions
Q: Can I connect multiple email accounts? A: Yes. Connect as many email accounts as you need. Each account appears in Email Configuration with its status.
Q: What email providers are supported? A: Currently Gmail and Microsoft Outlook are supported.
Q: Can I change an inbox name after creating it? A: Yes. Go to the inbox settings and edit the name anytime.
Q: How do I assign agents to an inbox? A: When creating or editing an inbox, select which team members should have access to that inbox.
Q: Can I see all communication history in one place? A: Yes. Open any customer record to see their complete communication history across all connected channels.