Notifications
What is it?
Notifications allow you to automatically send emails to team members when important events occur in your CRM. For example, you can send a notification when a quotation is created, a lead is assigned, or an opportunity reaches a specific stage.
Why use Notifications?
- Keep Team Informed - Automatically notify team members about important events
- Never Miss Updates - Get instant alerts when leads or opportunities are created or updated
- Reduce Manual Work - Eliminate the need to manually send notification emails
- Customizable Rules - Set up different notifications for different events and recipients
- Professional Communication - Use predefined email templates for consistent messaging
How Notifications Work
- An event happens in your CRM (e.g., quotation created)
- The system checks all active notifications for matching triggers
- If a notification matches, it identifies who should receive it
- An email is sent using the selected email template
- Team members receive instant notification about the event
Creating a Notification
Step 1: Basic Information
- Go to Admin Center → Notifications
- Click New Notification
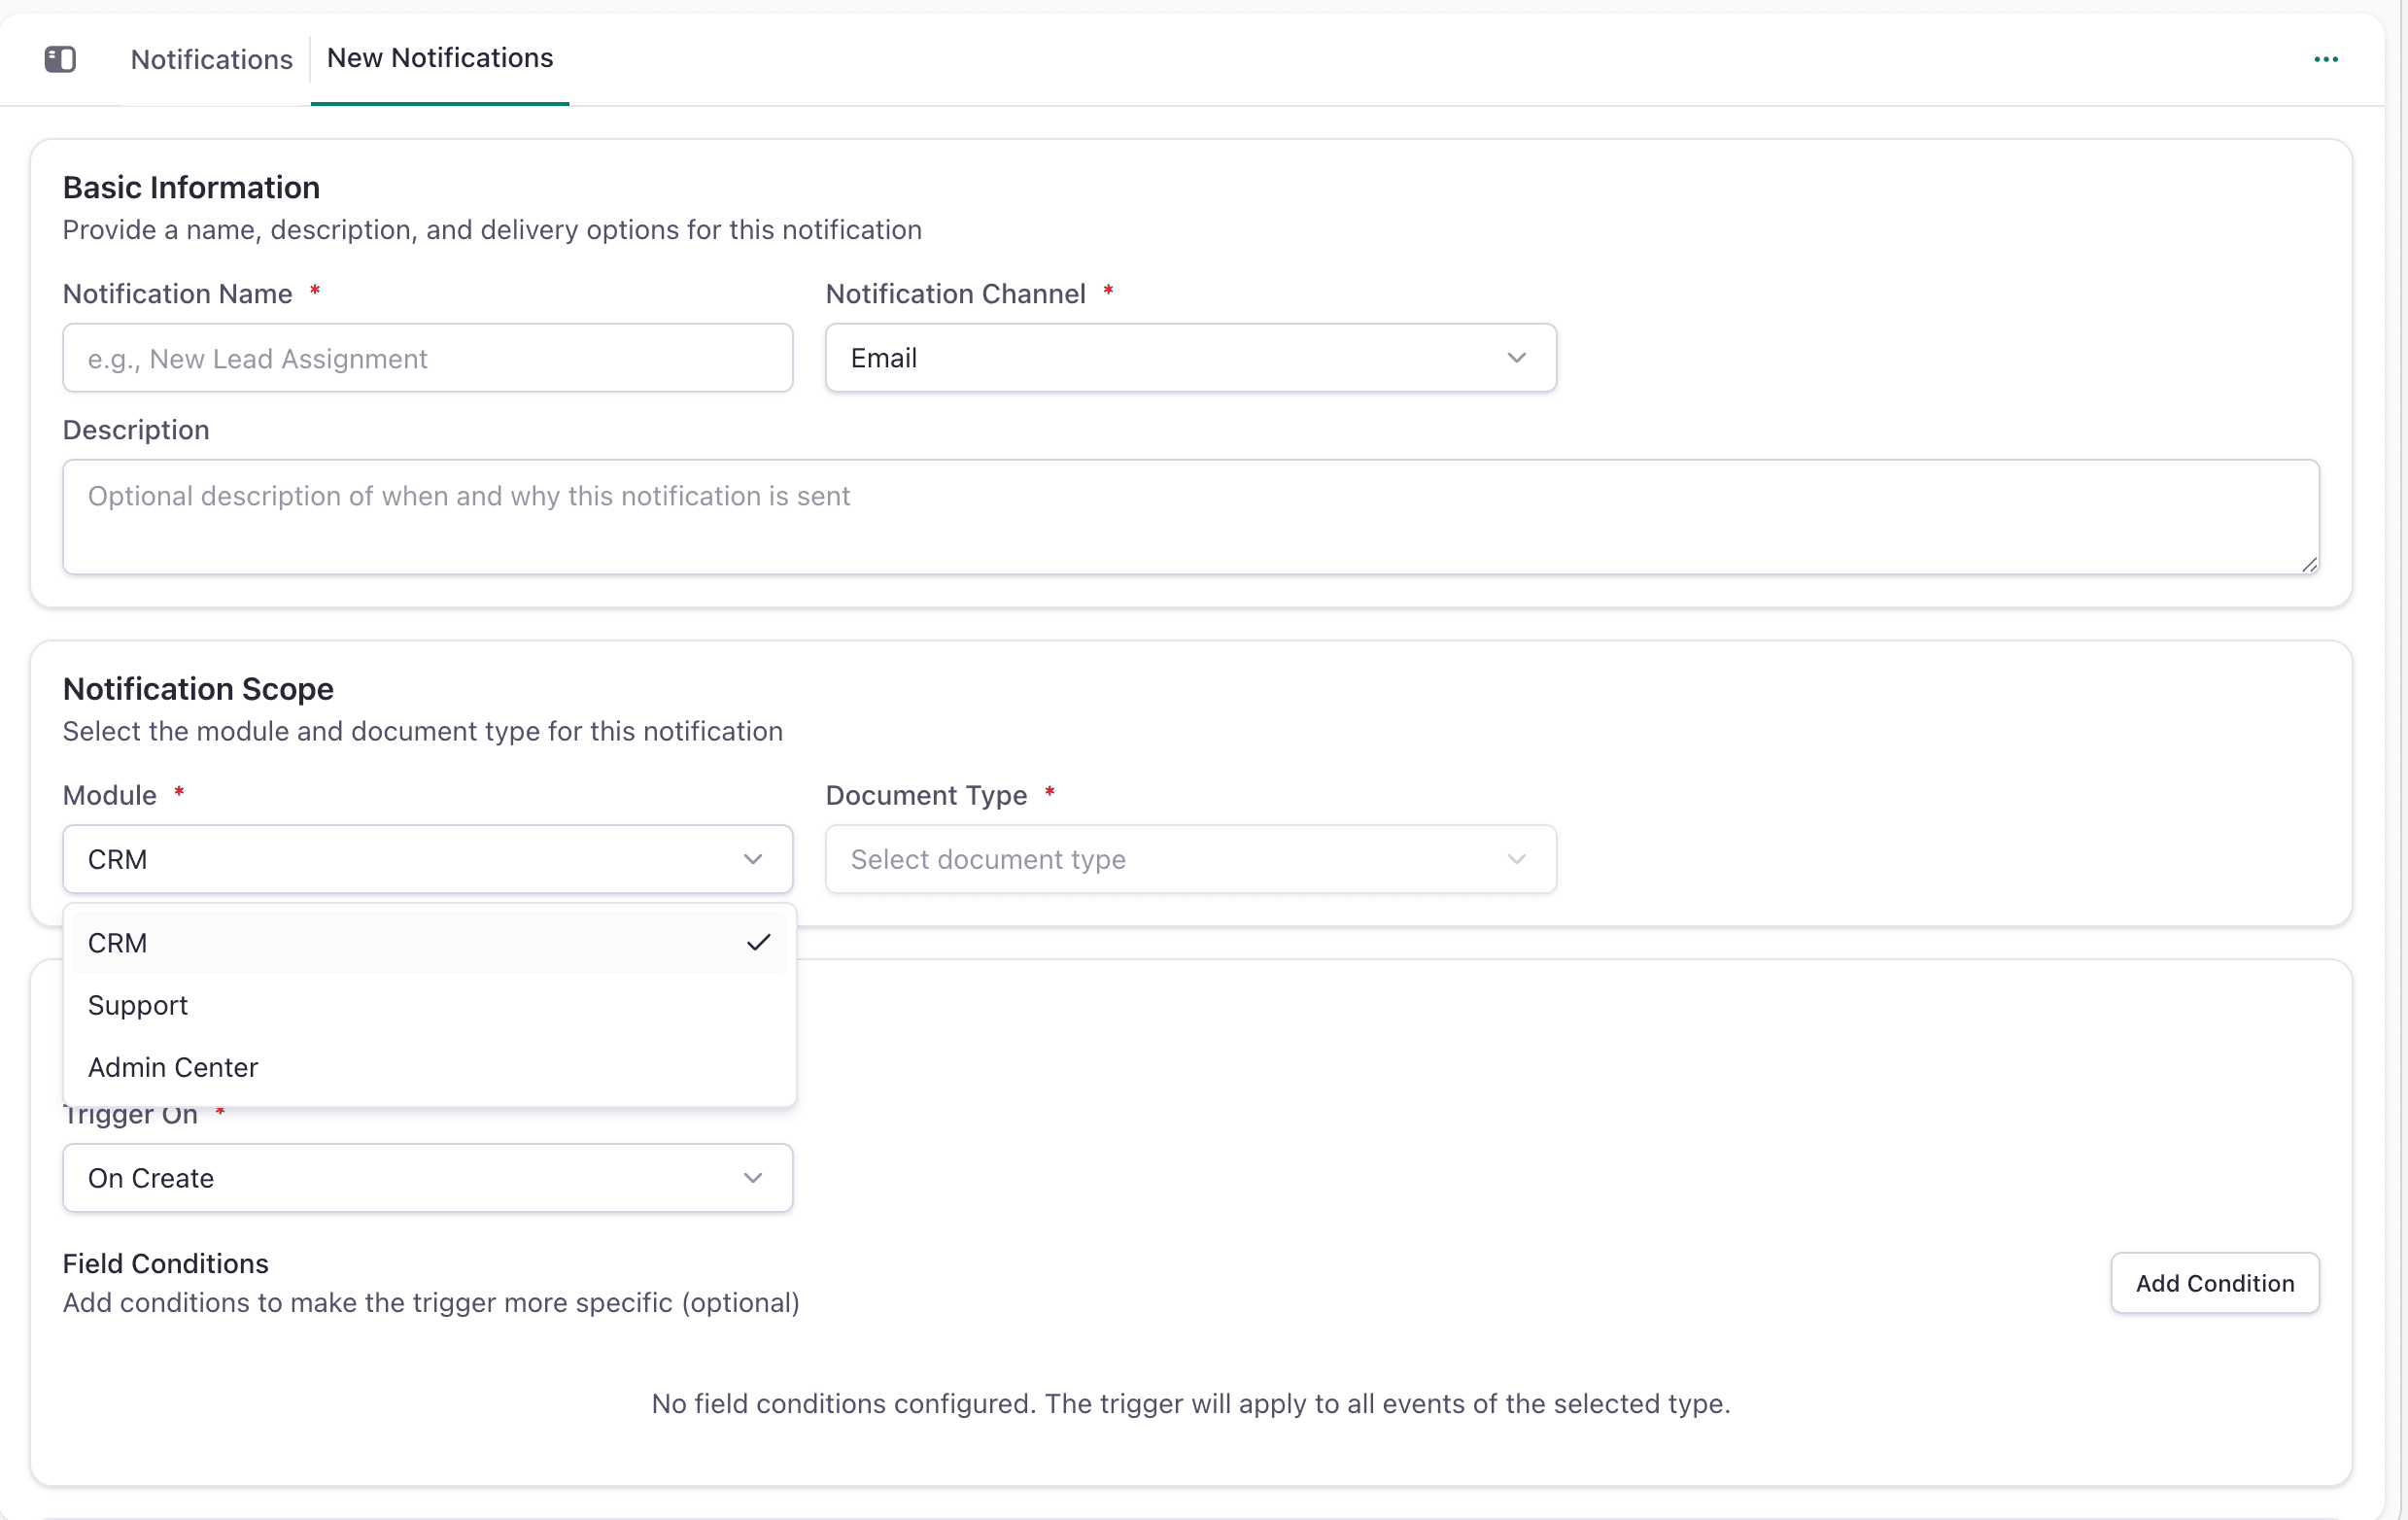
- Enter notification details:
- Notification Name: A descriptive name (e.g., "Lead Created Alert")
- Notification Channel: Select "Email"
- Description (optional): Explain when and why this notification is sent
Step 2: Set Notification Scope
- Select Module: Choose which module triggers the notification (CRM, Support, etc.)
- Select Document Type: Choose the specific type (Leads, Opportunities, Quotations, etc.)
This determines when your notification will be triggered.
Step 3: Configure Triggers
-
Trigger On: Select when to send the notification:
- "On Create" - When a new record is created
- "On Update" - When a record is modified
- "On Delete" - When a record is deleted
- "On Status Change" - When status changes
-
Field Conditions (optional): Add specific conditions to make the trigger more precise
- Example: Only send when Priority is "High"
- Multiple conditions can be combined
Step 4: Configure Recipients
Decide who should receive the notification using one or more methods:
Option 1: Assigned User
Send to the user assigned to the record
- Example: When a lead is created, notify the assigned sales representative
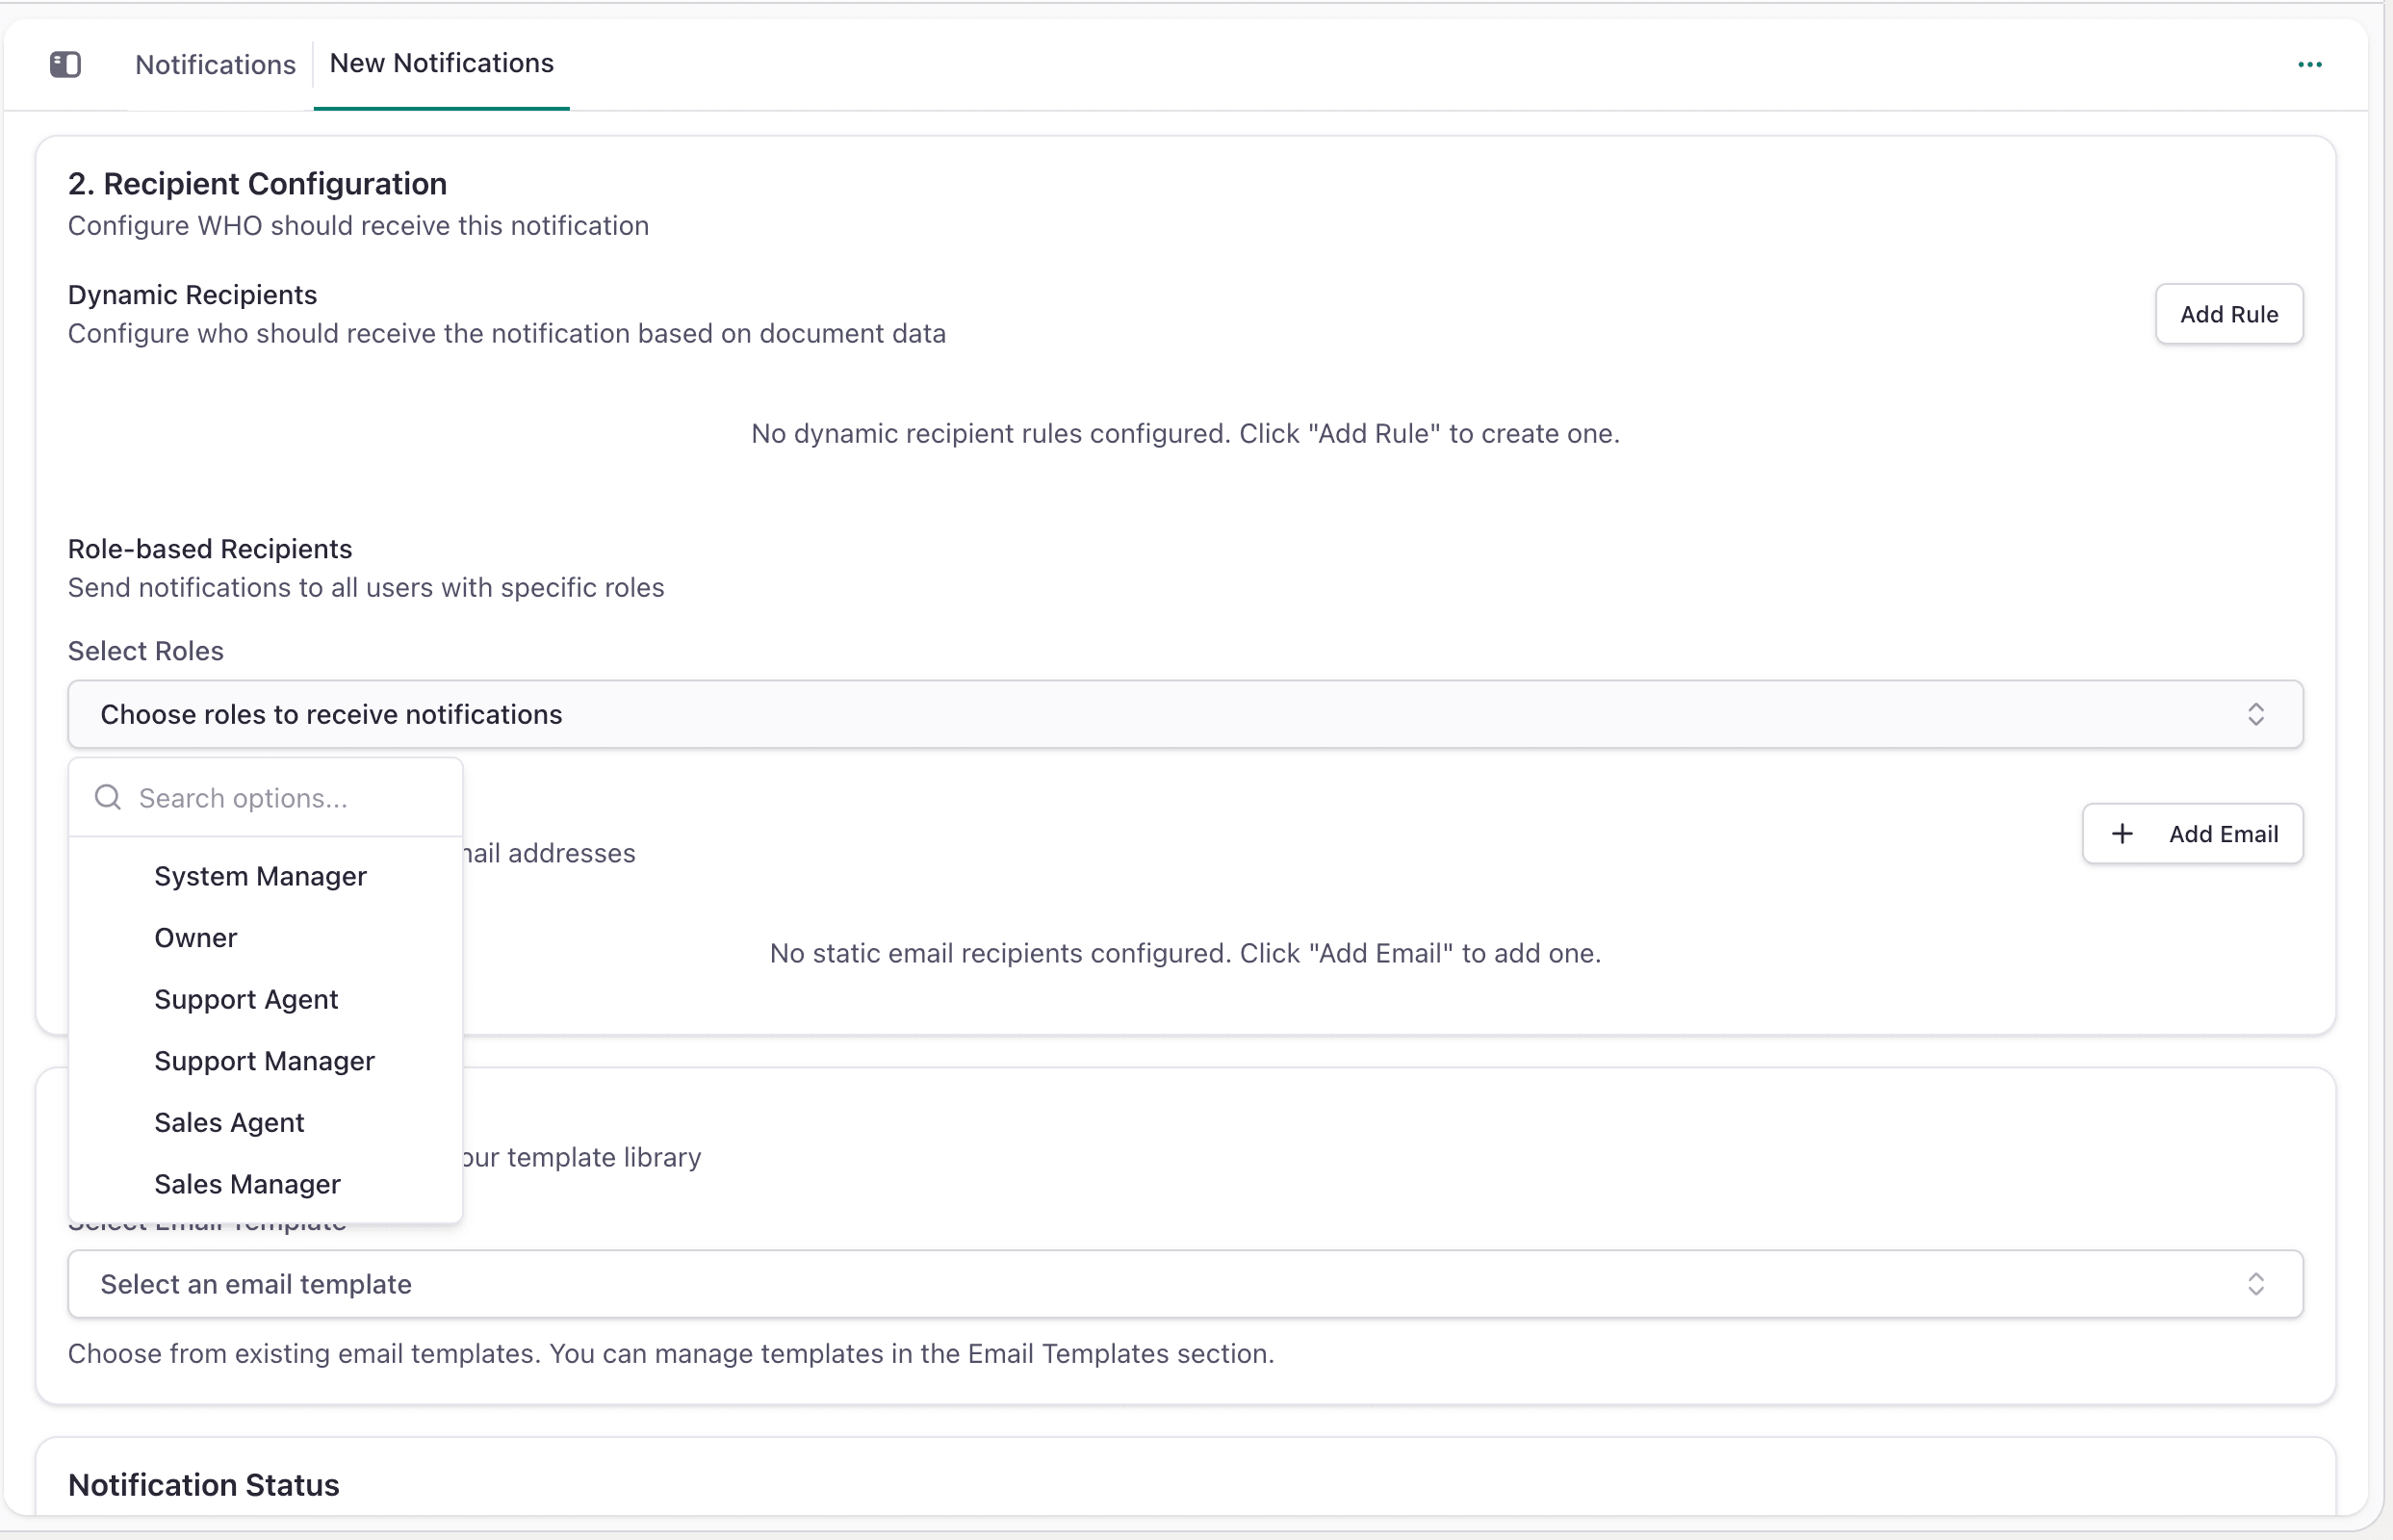
Option 2: Role-based Recipients
Send to all users with specific roles
- Example: Send to all "Manager" role users
- Go to "Select Roles" and choose the roles
Option 3: Static Email Recipients
Send to specific email addresses
- Click "Add Email" to add individual email addresses
- Useful for sending to external addresses or specific team members
Step 5: Select Email Template
- Click Select Email Template
- Choose a pre-designed template (e.g., "Lead Created", "Quote Created")
- The template determines the email subject and body format
- You can manage templates in Email Templates section
Step 6: Activate Notification
- In Notification Status section, toggle "Active" to enable
- When enabled, notifications will be sent for matching events
- You can disable temporarily without deleting the configuration
Step 7: Save
Click Update & Continue to save the notification
Managing Notifications
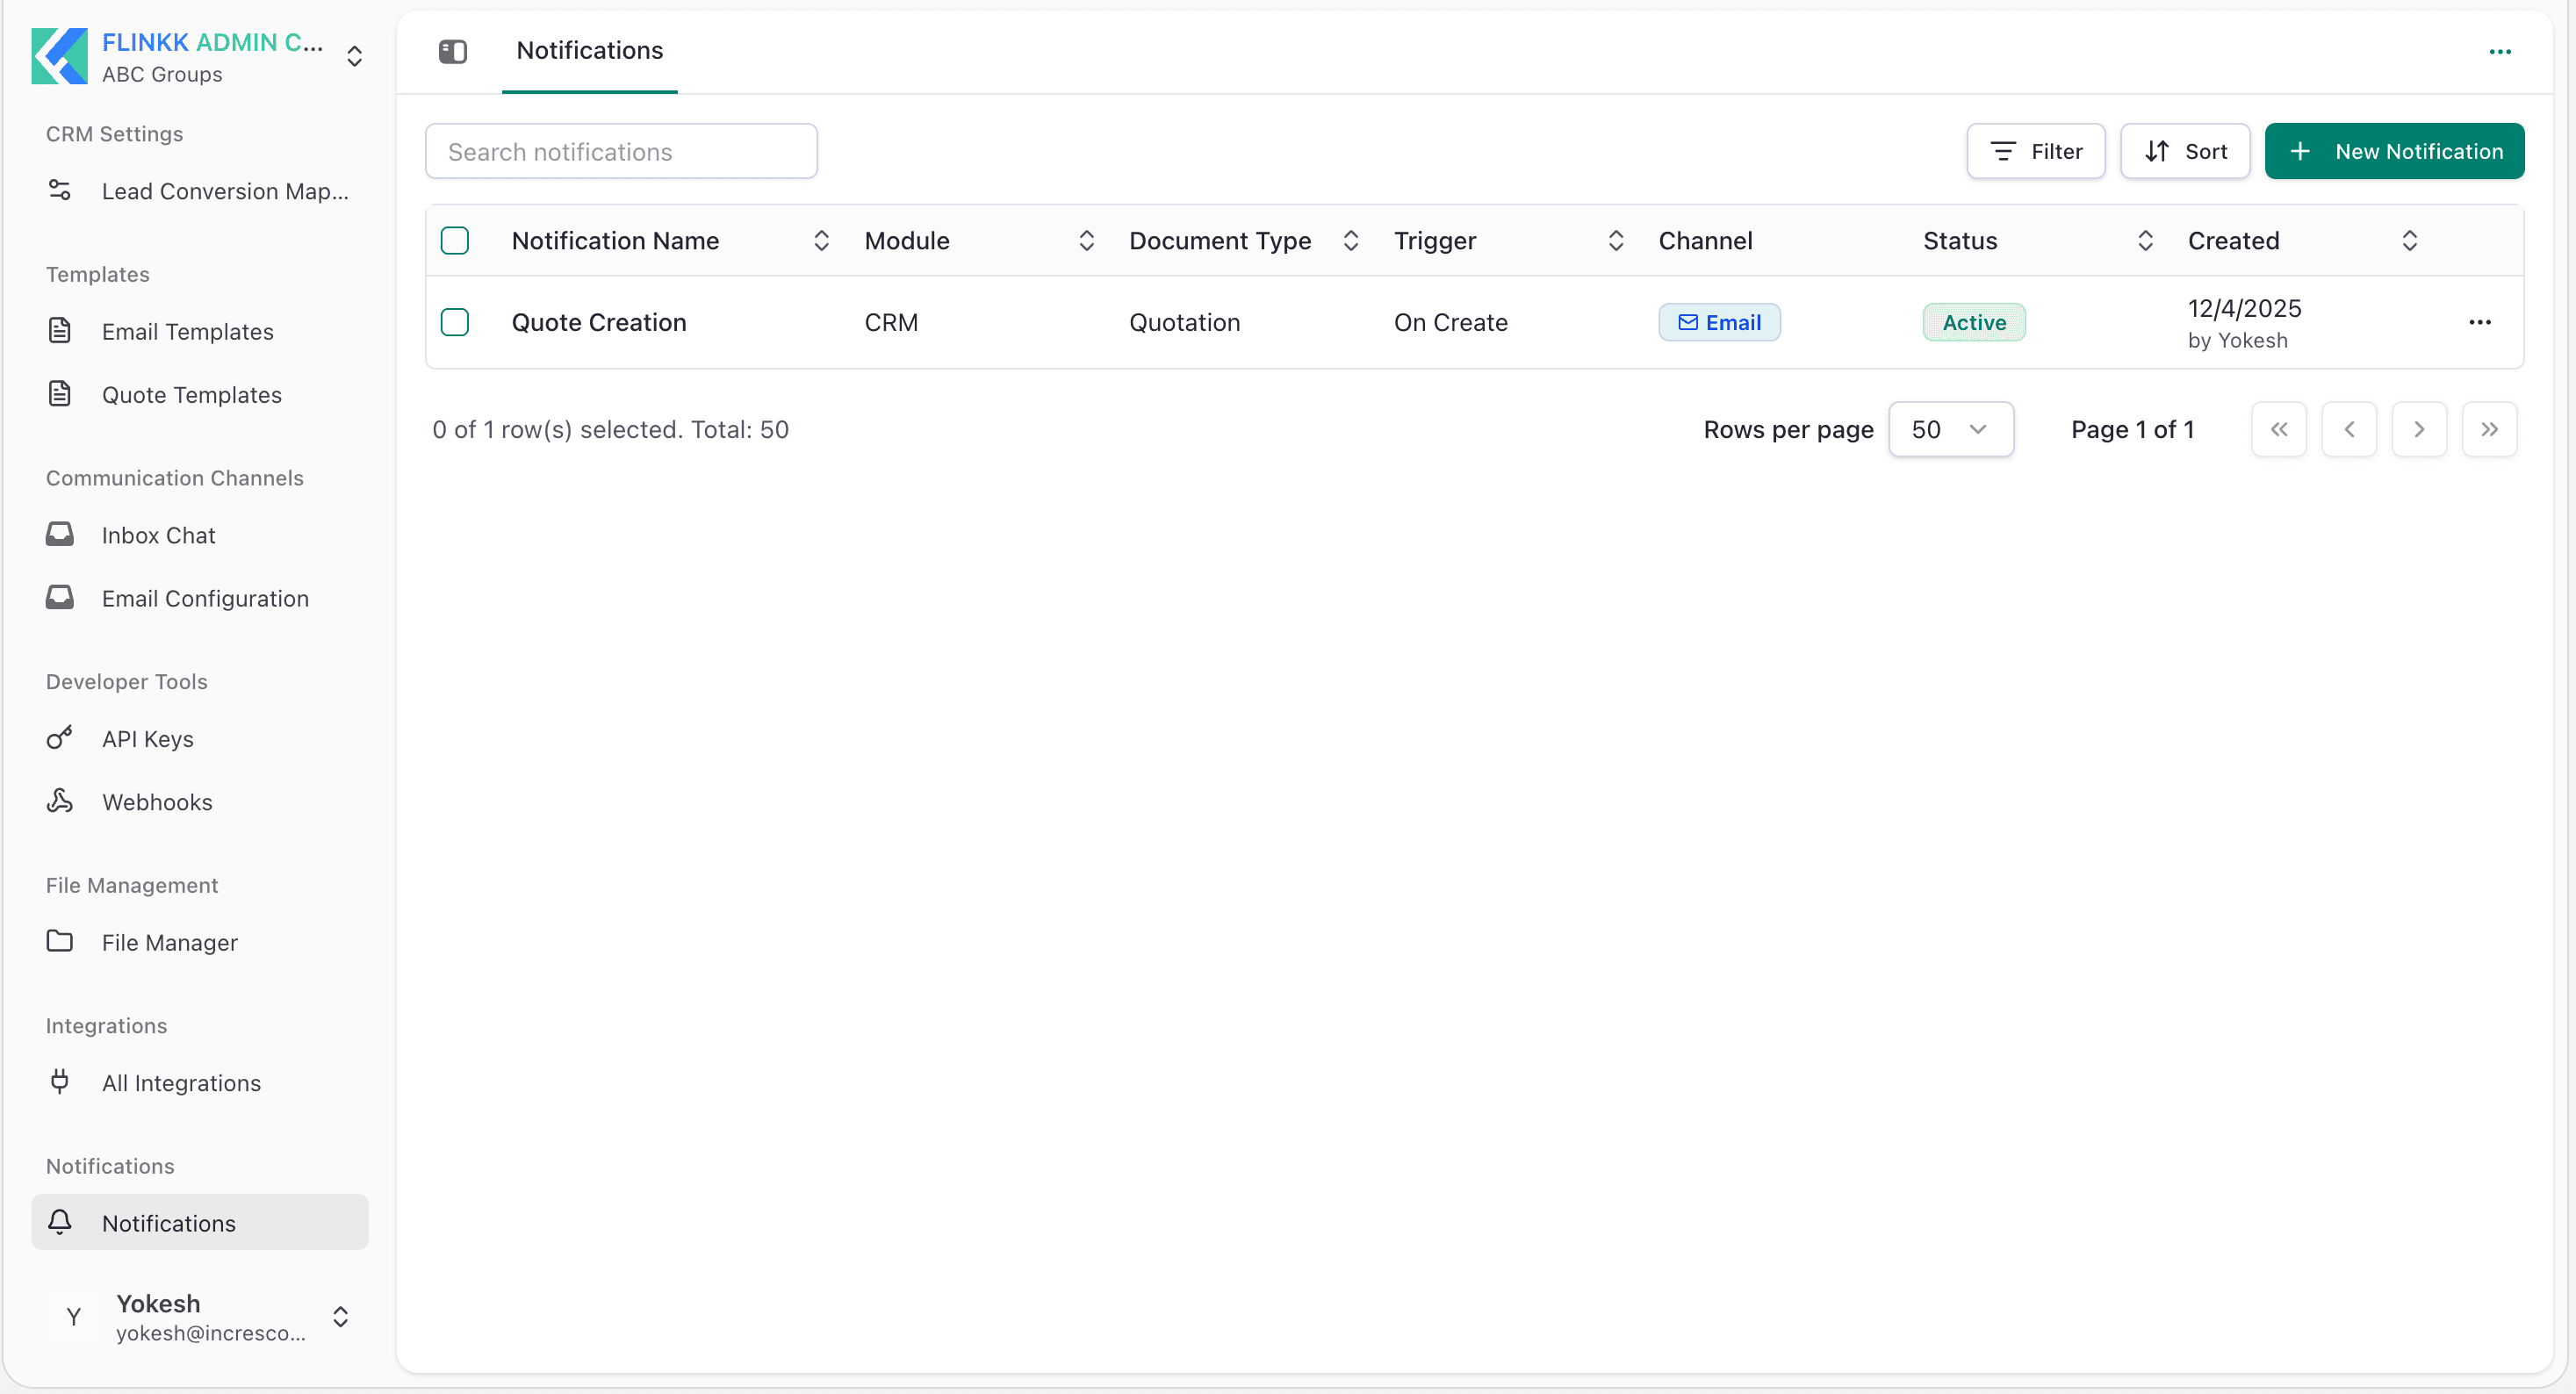
View All Notifications
In Admin Center → Notifications, you can:
- Search: Use the search box to find notifications
- Filter: Filter by module or other criteria
- Sort: Sort by notification name, module, or trigger
Edit Notifications
- Click on the notification name to open its configuration
- Modify any settings (recipients, template, trigger, etc.)
- Click Update & Continue to save changes
Disable Notifications
- Open the notification
- Toggle off the "Active" switch
- The notification will stop sending until you enable it again
Common Use Cases
Lead Created Alert: Send email to assigned salesperson when new lead is created
Quotation Follow-up: Notify account manager when quotation status changes to "Sent"
High-Value Opportunity: Alert sales manager when opportunity with amount over $10,000 is created
Payment Received: Notify finance team when payment status changes to "Completed"
Lead Reassignment: Alert both old and new owners when a lead is reassigned
Best Practices
- Avoid Too Many Notifications - Only create notifications for truly important events to prevent email fatigue
- Use Clear Names - Give notifications descriptive names so team members understand their purpose
- Review Recipients - Ensure the right people receive each notification
- Test First - Test notifications with a small group before rolling out to the entire team
- Update Templates - Use clear, professional email templates
- Monitor and Adjust - Disable or modify notifications based on team feedback
Troubleshooting
Notifications not being sent?
- Check that the notification is toggled "Active"
- Verify the trigger conditions match actual events
- Ensure recipients are configured correctly
- Check that an email template is selected
Wrong people receiving notifications?
- Review the recipient configuration
- Check role-based recipients have the correct roles assigned
- Verify static email addresses are correct
Need to pause notifications?
- Toggle off the "Active" switch to temporarily disable
- Re-enable when ready to resume sending
Next Steps
- Identify key events in your business that need notifications
- Create your first notification following the steps above
- Test with a team member to ensure it works
- Adjust recipients or triggers based on feedback
- Enable additional notifications as needed